Growing up, a common conversation I overheard between my mom and grandma went like this: “Do you have that recipe from our great aunt?”
“Sure, I do. Let me email it to you. Also, I have some funny jokes to forward along.”
My mom, and I’m guessing many others too, have kept every email they’ve ever received from their parents, family, and friends because they don’t want to lose the funny jokes, family recipes, announcements, and more that they’ve sent back and forth over the years. In the moment, our email accounts can feel like a day-to-day concern, or worse, a repository of spam. But for most of us, every email account holds some amount of treasured memories.
Nowadays, my mom has many different email accounts. But, she wanted to find a way to keep all of those emails she loved without having to keep the accounts themselves. She also found that she had so many emails in her inbox that she was running out of storage space.
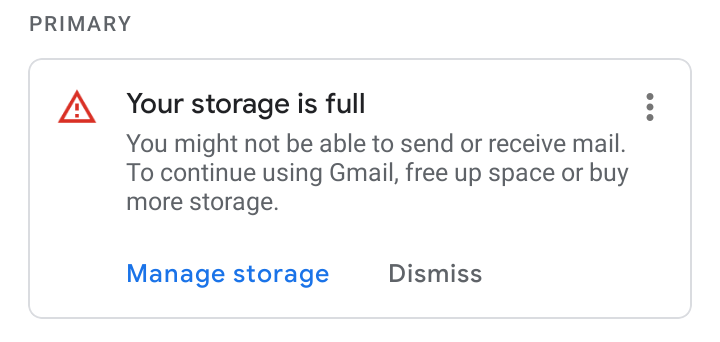
Buying more storage can become expensive and doesn’t guarantee that those emails are safely backed up and remain accessible. One option is to download the emails, delete them in the client, and back them up somewhere reliable and accessible for the long term.
If you’re looking for a way to keep old emails or just want to clean up your inbox storage because you’re running out of space, this post walks you through the steps of how to download your data from various email platforms.
We’ve gathered a handful of guides to help you protect content across many different platforms—including social media, sync services, and more. We’re working on developing this list—please comment below if you’d like to see another platform covered.
Getting Started: How to Download One Email
If you know the exact email you want to make sure you have a copy of, it’s very easy to download it from any client.
For this example, we are going to use Gmail, but this should work for most email clients. If you run into an email client that it does not work with, feel free to note it in the comments below and we’ll update the guidance.
-
- Log in to the email address you would like to download a copy of the email from. (I’m using Gmail.)
- Find the email you would like to download. For this example, I will be downloading a family recipe sent by my mom.

-
- Select “Print” in the top right corner.
- When the print screen appears, save the email as a PDF on to your computer.

- And presto, you have a copy of that email you would like to save forever.
This process can be a bit tedious as you would have to download each email one at a time. It also can be tough if you don’t remember how to find the email you would like to save. If this is true, there are also ways that you can download all of your email data.
While there are other file formats you can download individual emails in, we strongly recommend that—if you want to be able to manage or search your old emails—you download all of your emails (which we explain how to do below). This provides the data in easily manageable formats and is far more time efficient.
Getting Serious: How to Download All of Your Emails
Below, I explain how to download your email data from two top free email websites. Don’t see the email platform you use? Leave a comment below and we’ll work to add material to help you!
How to Download Outlook Emails
A lot of people use Outlook for various reasons, often for work or school. If you downloaded Microsoft 365, then you also have access to Outlook email. To export your email from Outlook and save it as a PST file (don’t worry about what a PST file is quite yet, we’ll explain below), do the following:
-
- Sign in to your Outlook account.
- Click the gear button in the upper right corner.
- Scroll down on the settings panel to “View all Outlook settings.”
- Click on the button with a gear symbol labeled “General.”
-
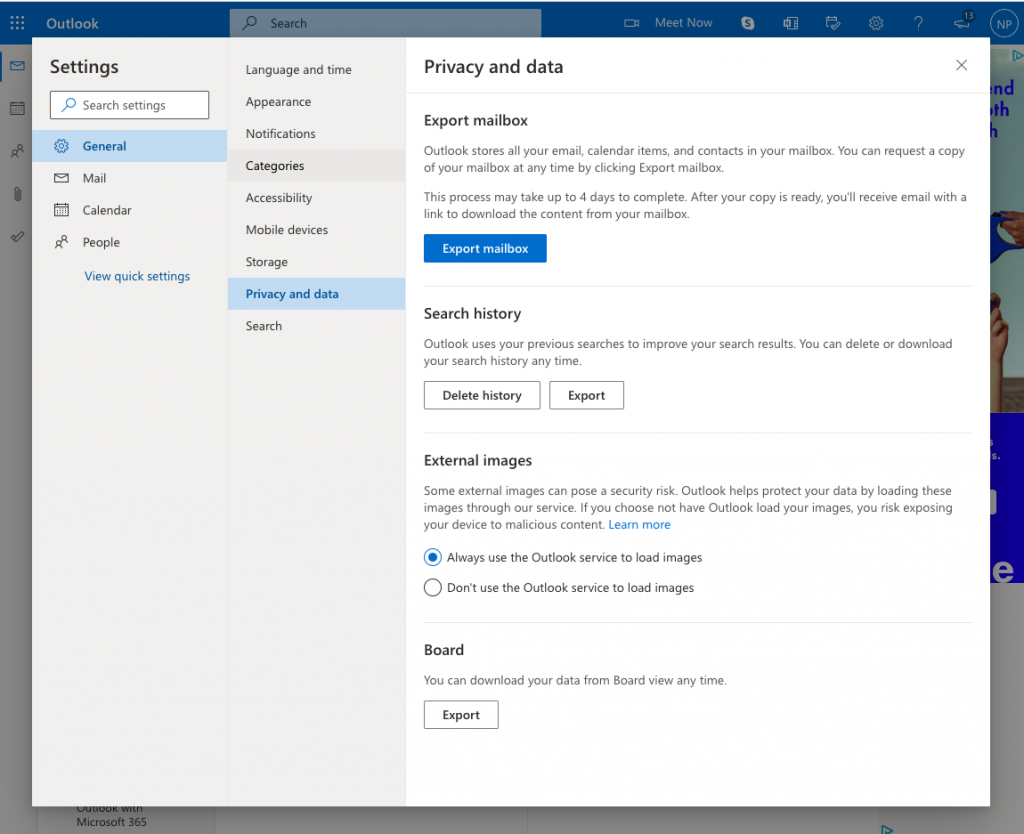
- Select “Privacy and data” on the second panel that appears.
- On the right side, there will be a button labeled “Export mailbox.” Select this button.
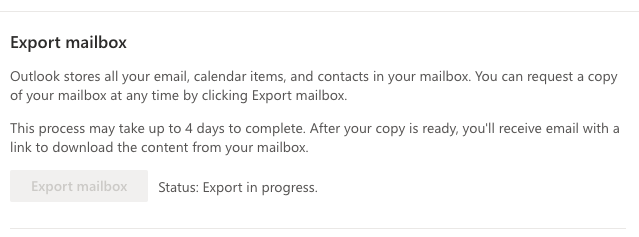
- The button will grey out and a status update will appear to let you know the download is in progress.
-
- When the export is complete, we’ve found that Outlook may not notify your inbox. If this is the case, you will need to repeat steps one through five and navigate to the “Download here” button. This button will only appear once your emails are ready to download.

- Click “Download here” to download your PST file with all of your email data. (Scroll past the section on downloading Gmail data to learn what to do with this file type.)
How to Download Gmail Emails
In a previous post, we explained how to download all of your data from Google Drive. But, if you are just looking to download your Gmail data, here is a more detailed way to just do that.
-
- Log in to the Google Account you’d like to download your emails from.
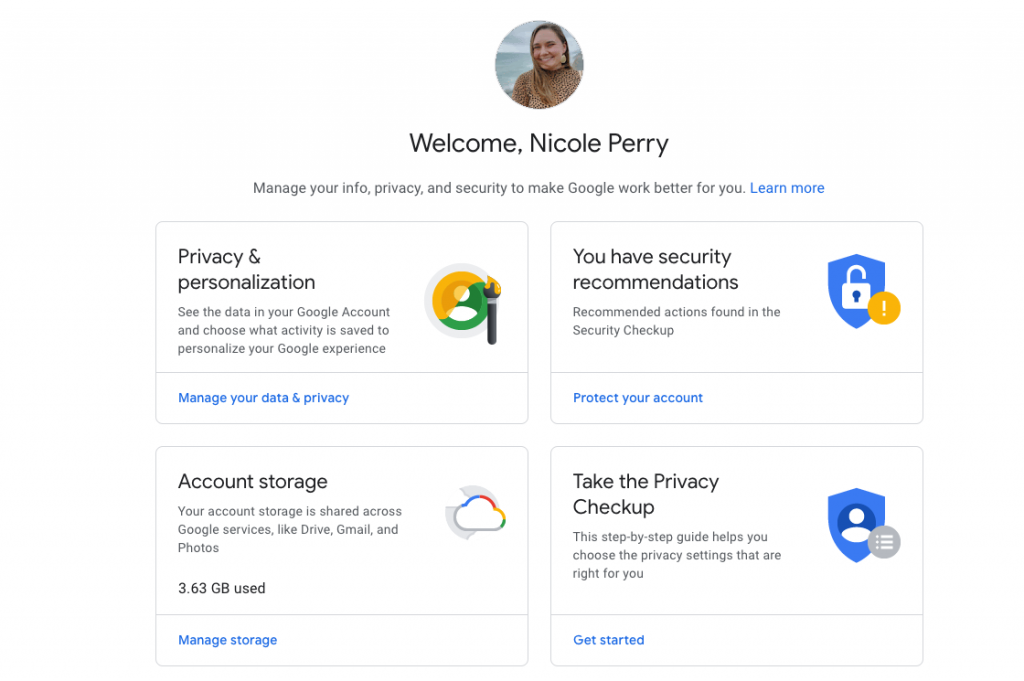
- Once signed in, you will want to go to: myaccount.google.com.
-
- Go to the “Privacy & personalization” section and select “Manage your data & privacy.”
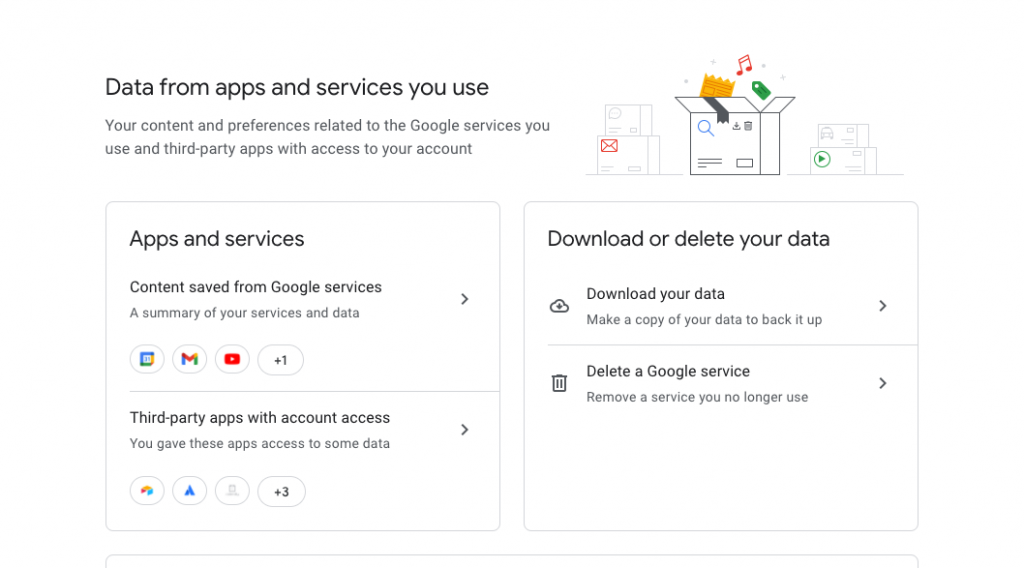
- On the next screen it takes you to, you’ll want to scroll down to a section labeled “Data from apps and services you use.” Here, you’ll select “Download your data” in the “Download or delete your data” section.
-
- From here, it’ll take you to the Google Takeout page. On this page, you’ll be given the option to select to download all of your Gmail emails and also your Google Chrome bookmarks, transactions from various Google services, locations stored in Google Maps, Google Drive contents, and other Google-related products you may use.
- If you want to download all your Google data, keep everything selected. If you just want a copy of your emails, deselect all and only select Google Mail to be downloaded.

-
- Click the next step on the bottom of the page.
- On the next page, you’ll decide what file type you would like it sent as, the frequency you would like this action to happen (Example: If you would like your data to be downloaded every six months, this is where you can set that to happen.), and the destination you would like your data to be sent to. For this example, I picked a one time download.

-
- Select “Create export” and you’ll see an export in progress page.
- An email will appear in a few minutes, hours, or a couple of days (depending on the size of data you are downloading), informing you that your Google data is ready to download. Once you have this email in your inbox, you have a week to download the data. Click the “Download your files” button in the email and you will have a ZIP file or a TGZ file (depending on what type of file you picked) on your computer with your Google data.

- When you open the ZIP, you will have all of your emails (including spam and trash) in an MBOX file.
What Is a PST File? What Is a MBOX File? How Do I Open Them?
A PST file is used by Microsoft programs to store data and items such as email messages, calendar events, and contacts. By moving items to an Outlook Data File (also known as a PST file) saved to your computer, you can free up storage space in the mailbox on your mail server. If you would like to make this file usable by other email clients, here’s a guide on how to convert your newly downloaded PST file to a MBOX file type.
An MBOX file is an email mailbox saved in a mail storage format used for organizing email messages in a single text file. It saves messages in a connected order where each message is stored after another, starting with the “From” header.
To open a MBOX file, you will need a third-party email program, such as Apple Mail or Mozilla Thunderbird. We recommend Mozilla Thunderbird, as it’s a free email client and it’s supported by both Macs and PCs.
This step is helpful if you would like to view the emails you downloaded. It also helps if you were looking to take the emails you downloaded and move them to a new inbox. For example, if you are afraid the email account you’ve used to sign up for everything over the past 10 years is vulnerable, you can download the emails from that inbox and move them to a new inbox using Apple Mail or Mozilla Thunderbird.
Great, now you’ve downloaded your emails. You’re not done yet! Read on to learn how to safely back up your emails so that you can hold on to them forever.
Use Backblaze B2 Cloud Storage Buckets to Keep an Organized Archive of Your Emails
Once you have your email data downloaded to your computer, it’s best practice to make sure that you have at least one copy of your data stored off-site in the cloud. Storing it in the cloud alongside two local copies ensures you never lose all those important emails.
A simple way to do this is with Backblaze B2, where you can upload and organize your files in buckets. To upload your files to a bucket, follow the steps below.
-
- Sign in to your Backblaze account.
- In the left hand column, select “Buckets” under the section “B2 Cloud Storage.”
- Click on the button “Create a bucket.”

- In the next step, you will need to create a unique name for your bucket and select some settings for it, like if it will be public or private or if you would like to enable encryption.
- Once the bucket is created, it will take you to a page where you can upload your files. You will want to drag and drop the email files you want to upload to it. If the MBOX file is too large to drag and drop into the bucket, you can use a third-party integration like Cyberduck to facilitate the upload. You can read the guide to using Cyberduck for Backblaze B2 bucket uploads here.
Alternatively, if you’re not worried about organizing or working with your email archives and just want to know they’re stored away safely, you can keep your downloaded files on your computer. If you follow this route, remember to sign up for a backup service that makes a copy of all of your computer’s files in the cloud. In the case of any data loss, a service like Backblaze Computer Backup would have a copy of all of your data ready for you to restore. If your email applications are locally stored on your computer, Backblaze will automatically back up your emails. You can learn more about how this works here. This approach will take up more room on your computer, but it’s a simple path to peace of mind.
From here, your MBOX file with all your emails from your family, friends, and reminders to yourself (We all have those!) will be safe in the cloud. If you ever want to pull out the archive and read the emails you saved, remember to use the third-party tools mentioned above. What’s important is that you have all your memories stored, safely with a provider who will ensure their redundancy and reliability.
Have questions or want to see a guide for an email client we didn’t mention above? Feel free to let us know in the comments!


 What’s the Diff: Hybrid Cloud vs. Multi-cloud